Showing posts with label breads. Show all posts

Friday, May 14, 2010

Cheddar Cheese French Bread

I have to tell y'all how proud I am of my homemade french bread! I could not believe how gorgeous it turned out! Take a look:


Doesn't it look like what you get at the store? Oh my gosh! It was SO fresh and soft and....hmmm, hmmm, good. I used this bread to make some delicious sandwiches that was a knock off from something we ate at Pizza Hut. Be on the lookout for that recipe later on this weekend, but for now...how about the recipe for these lovlies?

I wound up making four loaves of bread from this one recipe, so I froze the rest of them to use for garlic bread for some new pasta recipes I am making next week.

Cheddar French Bread

Ingredients
2 packages of active dry yeast
2 and 1/2 cups of warm water
1 tablespoon of salt
1 tablespoon of olive oil
7 cups of all purpose flour
cheddar cheese for sprinkling on bread

Directions

Put warmed water in a bowl and add yeast. Dissolve yeast in warm water.

Add salt, butter, and flour. Mix these together until well blended. Dump out onto a floured surface and knead for five minutes. Check to see how pliable the dough is. It will be sticky.

Take a clean bowl and grease it well. Place dough in bowl and roll it around to coat it in the oil. Cover top and let rise for about an hour or until doubled in size.

Punch dough down and divide into fourths. Roll each fourth into a rectangle. You may want to make sure to roll them out rather thin because when they rise they will get pretty big. Now begin to roll the rectangle up as tight as you can get into a long roll. Be sure to fold ends under and seam together the ending position.

With a sharp knife, make four diagonal cuts on the top. Brush with melted butter and sprinkle cheddar cheese on top. Bake at 450 degrees for 25 minutes.

Wednesday, February 24, 2010

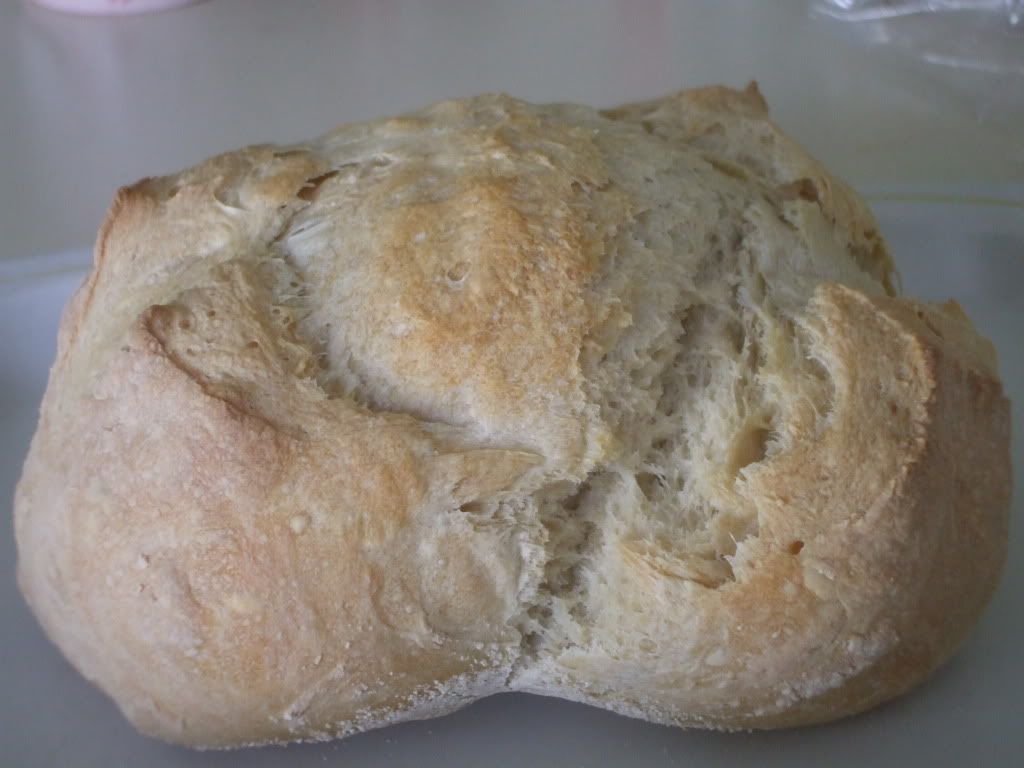
No Knead Artisan Bread

 
I love bread. Period. But what I love more than bread is a recipe that does not require any kneading on my part! Here is a delicious and SUPER easy recipe! My loaf came out kind of lopsided, but still tasted delicious. To see what it should really look like, go HERE.

The recipe is also on that page!

Tuesday, February 23, 2010

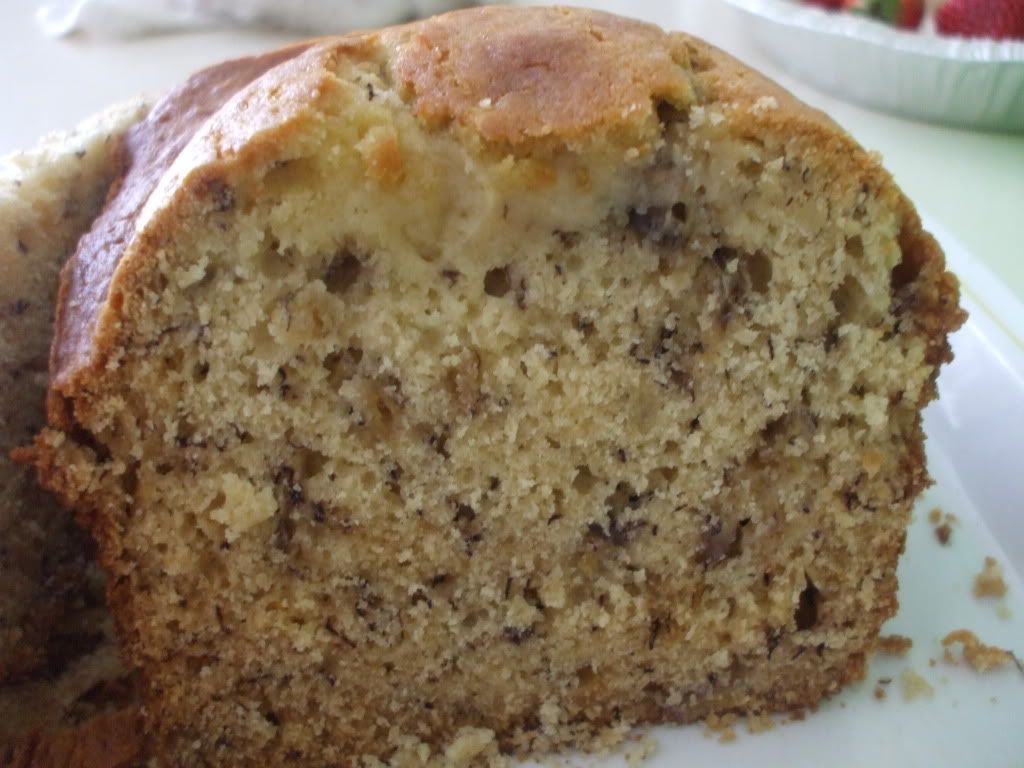
Banana Bread


When I have over ripening bananas laying around, I know it is time to make a wonderful batch of banana bread. It does not last long around here at all!

Here is my recipe. I hope you enjoy it.

Ingredients

  • 2 cups all-purpose flour
  • 1 teaspoon baking soda
  • 1/4 teaspoon salt
  • 1/2 cup butter
  • 3/4 cup brown sugar
  • 2 eggs, beaten
  • 2 1/3 cups mashed overripe bananas

Directions

  1. Preheat oven to 350 degrees F (175 degrees C). Lightly grease a 9x5 inch loaf pan.
  2. In a large bowl, combine flour, baking soda and salt. In a separatebowl, cream together butter and brown sugar. Stir in eggs and mashedbananas until well blended. Stir banana mixture into flour mixture;stir just to moisten. Pour batter into prepared loaf pan.
  3. Bake in preheated oven for 60 to 65 minutes, until a toothpick insertedinto center of the loaf comes out clean. Let bread cool in pan for 10minutes, then turn out onto a wire rack. 
What is your favorite bread recipe?

Tuesday, January 26, 2010

Sourdough Bread

I don’t know about you but I love bread. I could eat it at every meal. I try to be really good if I know we are having bread and not eat so much of it, but when I bake fresh homemade bread…all I can say is “watch out”.
This week, I made sourdough bread AND Amish Friendship Bread. I thought I would share both recipes with you since you know how I love to cook and then share what I made!
006 (2)
Sourdough Bread
In order to make sourdough bread, you have to have a starter. The process can be a bit long, so here is the link to an easy sourdough starter. Once you have your starter complete, you can make this bread.
  • 2 Cups of proofed starter
  • 3 Cups of unbleached flour
  • 2 tablespoons of olive oil or softened margarine
  • 4 teaspoons of sugar
  • 2 teaspoons of salt
Add the sugar, salt, and oil (the oil is optional - you can use softened butter instead, or no oil at all) to the 2 cups of proofed starter. Mix well, then knead in the flour a half-cup at a time. Knead in enough flour to make a good, flexible bread dough. You can do this with an electric mixer, a bread machine on "dough cycle," or a food processor. You can also do it with a big bowl and your bare hands.
Let the dough rise in a warm place (I use my oven) until doubled in size. This can take anywhere from an hour to two hours depending on how proofed your starter was.
Once it has risen, punch it back down and knead a little more. Divide dough in half and place in a slightly greased loaf pan. Allow to rise again until double in size.
Place bread in a 350 degree un-preheated oven for about 35 or 40 minutes. Bread is done when it sounds hollow when thumped. Allow it to cool for an hour before slicing.
Tomorrow I will share my Amish Friendship Bread recipe with you!

Sunday, January 24, 2010

Crescent Rolls

I happened upon this website when I was looking for a crescent roll recipe and I have already fallen in love!

The recipe at first threw me because they call them butterhorn rolls, but they are made the exact same way as crescent rolls. My daughter says that they taste better than crescent rolls.


This was the first batch. I had to make another batch just like this, so I wound up with 44 crescent rolls. I followed their recipe, which you can find HERE.
After making them, I went ahead and cooked them all in the oven. I let them cool and then I put them in a large freezer bag so that I could freeze them. Then when I need some for dinner, I pop out what I need, let them thaw, and then warm them in the oven.
Kayla has even been caught getting one down and warming it in the microwave when she wants a little bread taste!
This is a great money-saving tip. Making your own bread from biscuits, rolls, and now loaves of bread will save money in the long run and it winds up being so much better for you!

Thursday, January 21, 2010

Chocolate Chip Muffins

I love homemade muffins. My favorite are blueberry, but my kids LOVE chocolate chip muffins. I used to buy the pouches of mix at the store until I found out just how easy it is to make them homemade and they taste even better!014

Chocolate Chip Muffins

Ingredients

1 1/2 cups of all purpose flour

1/3 cup granulated sugar

1/4 cup packed brown sugar

1/2 teaspoon baking powder

1/2 teaspoon ground cinnamon

1/2 teaspoon salt

2 eggs

1/2 cup butter, melted then cooled

1/2 cup milk

1 teaspoon vanilla extract

1 cup of semi-sweet chocolate chips


Directions

Preheat oven to 375 degrees. Lightly grease a 12-cup muffin tin.


In a large bowl, mix flour, sugar, brown sugar, baking powder, baking soda, cinnamon, and salt. Set aside.


In a separate bowl, beat the eggs. Stir in melted butter, milk, and vanilla. Add to flour mixture, stirring just until dry ingredients are moistened. Stir in chocolate chips. Spoon batter into muffin tins, filling each about 2/3 cup full.


Bake for 20-22 minutes, or until a wooden toothpick inserted comes out clean.

Amish Friendship Bread

Several years ago, my very good friend Annette gave me a ziplock bag filled with a goo and a recipe on a card labeled “Amish Friendship Bread”. Little did I know that this sweet tasting bread would become a family favorite around here.
It took me a while to find the starter recipe for this bread because once you run out of starters, you cannot make this bread again until someone gives you one.
Luckily though, I found one on the Internet! You can read the story behind this bread here.
049
Amish Friendship Bread
Amish Friendship Bread Starter:
1 tablespoon Active Dry Yeast
2 cups Warm Water — (110 degrees)
1 cup Flour
1 cup Sugar
1 cup Milk
Mix all of this up and place in a gallon Ziplock Bag. This is what your bread will start from. Do not refrigerate! Do not stir with a metal spoon! The starter requires 10
days for fermentation.
Day 1- Begin or receive starter
Day 2- Squeeze bag several times a day.
Day 3- Squeeze bag several times a day.
Day 4- Squeeze bag several times a day.
Day 5- Add 1 cup sugar, 1 cup flour, 1 cup milk
Day 6- Squeeze bag several times a day.
Day 7- Squeeze bag several times a day.
Day 8- Squeeze bag several times a day.
Day 9- Squeeze bag several times a day.
Day 10- Empty contents of bag into a bowl and add 1 cup sugar, 1 cup flour, and 1 cup milk.
Put 1 cup of starter in 3 different gallon ziplock bags. Give 2 away to friends and keep one. This will begin their Day 1.
For Amish Friendship Bread

1 cup Vegetable Oil
1 cup Sugar
2 cups Flour
3 Eggs
1 small Vanilla Pudding Mix — Instant
1 teaspoon Cinnamon
1/2 teaspoon Salt
1/2 teaspoon Baking Soda
1/4 teaspoon Baking Powder
1/2 cup Milk

Cinnamon Sugar:
1 cup Sugar
2 tablespoons Cinnamon
You will have about 1 cup of batter left besides the 1 cup you have saved for yourself. To the remaining batter add vegetable oil, sugar, flour, baking powder, baking soda, eggs, milk, vanilla pudding mix, cinnamon, and salt. Beat until well blended. Add one cup raisins, chocolate chips or nuts, if desired.
Grease 2 loaf pans well, and sprinkle with cinnamon sugar, coating bottom well. Turn batter into pans, and sprinkle remaining cinnamon sugar onto tops of loaves. Bake at 325 F degrees for one hour.
This has become one of our favorite sweet breads! A trick that we use is that if you cannot find anyone to give the starters away to, just put them in the freeze. They will hold okay for about 6 months.

This post is linked to Our Krazy Kitchen.

Saturday, December 26, 2009

A Pioneer Woman Meal

Last week, I got my new Pioneer Woman cookbook in the mail (I know…can’t you just hear me squealing with delight!)
51AIss1NSAL._SL500_AA240_
As soon as I opened it, I was blown away by all the beautiful photos, some of which I have seen because I follow her blog.
I picked out a few of her recipes, along with some of my own and made a meal fit for a king! We started off the evening with scrumptious stuffed jalapenos. 003
I had never eaten any before and all I can say is WOW! The skins of the peppers get really soft and just melt in your mouth, along with the cream cheese, bacon, and barbecue sauce(anything with bacon is good, right).
Then our next course was my favorite Herb Crusted Tenderloin! This thing always turns out scrumptious. It comes from my girl Paula Deen!
005
You just cannot have meat without some kind of bread, right? I had been eyeing these rolls on PW’s website for sometime now and I was bound and determined to make them. As always, it did not let me down one little bit! These rolls are SO buttery and flavorful, that I have made them now four times since we had this meal!004
And then a meal is never complete without potatoes! In the cookbook, PW shares her recipe for Potato Skins. OH MY WORD! These skins are just like the ones in the restaurant!
007
To get this recipe, you have to get your own cookbook, cause I couldn’t find this recipe on her website!
As you can tell I love cooking for my family! Hopefully in 2010 I can share some more meal pleasing dishes with you!

Wednesday, December 23, 2009

Homemade Hamburger Buns

About a week ago, I was reading a blogpost over at Frugal Village on how to make your own hamburger buns. At first I was like...yeah right...it's so much cheaper to just go buy a pack of hamburger buns, but in my effort to do away with prepackaged food, I decided to try it.

Can I just say that this recipe rocks? I mean it totally ROCKS! My hubby wasn't for sure about these buns...that was until he walked in and saw what his supper looked like that night. You wanna see? Come closer....
They look pretty darn tasty don't they??? I baked some porkchops that I got on sale at the butcher shop for $3.00 (I cooked like 8 chops). My buns cost me little to nothing to make because I already had everything on hand!

Here is the recipe:
Hamburger Buns
1-1/4 cups milk
1 egg, beaten
2 tablespoons butter or margarine, softened
1/4 cup granulated sugar
3/4 teaspoon salt
3-3/4 cups bread flour
1-1/4 teaspoons active dry yeast
1 tablespoon butter or margarine, melted


1. Mix the first seven ingredients together. Knead dough for a few minutes and then put in a lightly greased bowl, cover with a towel and allow to rise for an hour.
2. After about an hour, take dough and pull small pieces off and roll into a ball. Pat them out to about the size of a hamburger patty with them being about 1/2" thick.
3. Place on an ungreased cooking sheet about 1" apart. Cover and let rise again for another hour.
4. Brush rolls with melted butter. Baked at 350 degrees for about 15 to 20 minutes until done. I brush them again with butter and place them under the broiler to get them a little browner.
5. Slice them and enjoy them with hamburgers, chops, steaks, or whatever sandwich you want to make!


Sunday, December 20, 2009

Honey Wheat Bread

I have to say that I am quite proud of my loaf of bread that I made today! It turned out so pretty and actually looked like bread! LOL

The recipe that I used was one that I found on Hillbilly Housewife (I love this site! So full of useful and delicious low cost recipes!)

Here is the link to the recipe and my photo of my very own homemade loaf of bread!


Do you make bread from home? If so, how has yours turned out? Do you have any good tips for a greenhorn like myself??

Tuesday, December 15, 2009

Homemade Bread Bowls

I was at the store the other day and liked to have had a cow (that's Kentucky slang for throwin a fit) when I saw the cost of a round loaf of bread to use for a bread bowl. Almost $5.00! What???? I was NOT going to pay that price for some bread!

I started searching on my favorite recipe sites and finally found one that was worth trying: Bread Bowl Recipe from All Recipes.


I was kind of nervous because anytime I have fixed bread, it doesn't "poof" like it is supposed to. But this time...well.....look....I was so excited! we filled them with my famous Chicken Chili Recipe and they turned out delicious!

Sunday, November 29, 2009

Sourdough Bread

I don’t know about you but I love bread. I could eat it at every meal. I try to be really good if I know we are having bread and not eat so much of it, but when I bake fresh homemade bread…all I can say is “watch out”.
This week, I made sourdough bread AND Amish Friendship Bread. I thought I would share both recipes with you since you know how I love to cook and then share what I made!
006 (2)
Sourdough Bread
In order to make sourdough bread, you have to have a starter. The process can be a bit long, so here is the link to an easy sourdough starter. Once you have your starter complete, you can make this bread.
  • 2 Cups of proofed starter
  • 3 Cups of unbleached flour
  • 2 tablespoons of olive oil or softened margarine
  • 4 teaspoons of sugar
  • 2 teaspoons of salt
Add the sugar, salt, and oil (the oil is optional - you can use softened butter instead, or no oil at all) to the 2 cups of proofed starter. Mix well, then knead in the flour a half-cup at a time. Knead in enough flour to make a good, flexible bread dough. You can do this with an electric mixer, a bread machine on "dough cycle," or a food processor. You can also do it with a big bowl and your bare hands.
Let the dough rise in a warm place (I use my oven) until doubled in size. This can take anywhere from an hour to two hours depending on how proofed your starter was.
Once it has risen, punch it back down and knead a little more. Divide dough in half and place in a slightly greased loaf pan. Allow to rise again until double in size.
Place bread in a 350 degree un-preheated oven for about 35 or 40 minutes. Bread is done when it sounds hollow when thumped. Allow it to cool for an hour before slicing.
Tomorrow I will share my Amish Friendship Bread recipe with you!

Homemade Bread

001
Here is a picture of my homemade bread. It only took me four tries to finally get it right! I tried many recipes, but the one that took and actually worked for me was the one I found on the Hillbilly Housewife website.
Her recipes are awesome! There has not ever been one that I have made that has not tasted fabulous! If you are new to cooking and looking for some help and inspiration, her website and recipes are just the key!
Here is the link to the bread recipe.
Beginner’s Bread

Wednesday, August 19, 2009

Breakfast Biscuits

I have been trying and trying to perfect my homemade biscuits and I finally figured out what my problem has been all along.

Are you ready for this secret?

I mean it really is a secret.

The secret to delicious fluffy biscuits is this: DO NOT OVERWORK THE DOUGH!

And I mean that with all simplicity that it says. You barely mess with the dough and you will have mouth watering biscuits that look this delish!
Here is the delicious recipe for these mouthwatering homemade Yummies:

Biscuits

2 cups self rising flour
3 TBSP shortening
1 cup milk

Put flour in a bowl.
Add shortening.
Mix those two together barely.
Add milk.
Stir with a fork just until blended. (dough will be sticky)
Flour surface and scoop dough out onto floured surface.
Sprinkle dough with a little more flour and begin to knead a couple of times until dough is covered with flour and no longer sticky.
Roll dough out to 1/2-1" thick and cut biscuits.
Cook in over on 450 degrees for about 8-10 minutes.
Turn oven to broil to brown biscuits on top.
Brush with melted butter.